Have you ever watched some one throw pots or blow glass, dance or draw? They make it look so easy, don’t they? Well, I’m here to tell you it’s not. It looks easy because dedicated artists have had so much practise at what they do when you watch them do their thing in the moment it does look easy. Practise make perfect, right?
I like the Native Americans’ philosophy on perfection. No human is perfect. Only The Creator is perfect, so imperfection is worked into Native crafts purposefully. I don’t have to work imperfection into my pots purposefully. It seems that I come by making something imperfect quite naturally. I usually end up sticking my fingernail into a wet pot gouging out a piece of clay or dribbling wax resist where I don’t want it. There is usually something slightly wonky about a pot. Wabi sabi. And that’s okay!
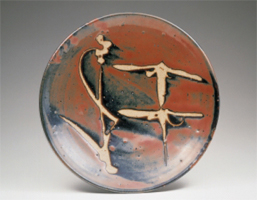
The great potter Shoji Hamada made pots that were off centre or wabi sabi and when it was pointed out he apparently stopped the wheel and asked the person who said it was crooked, “Where?” You can’t see the so-called imperfection unless the wheel is spinning. If you had a high speed Lazy Susan with the pot placed dead centre then maybe you might be able to detect it. And who made this rule about hand crafted things having to be perfect anyway?
Hamada and his work.
The reason for this blog isn’t necessarily to point out imperfections in hand crafted pottery though. The reason I started to write today is because I spend a great deal of time explaining to potential customers – either through email, on the phone or in person how my job is done. If I can refer them to this blog, that means I get more time in the clay studio!
I suppose a lot of my clients have some idea about how pottery is made but they have a very tiny snapshot of all of the steps involved which, if they better understood they would know why they can’t have it exactly the way they want it. As much as I would like to have you all ask me to make something for you, you need to know how I roll because my work just may not be what you really want.
The first step in pottery making is working with the clay. I like to make pots on the potters’ wheel and also to hand build pottery. What’s the difference? Well, hand built pots can be more time consuming or less time consuming depending on the pot I choose to make.
From my very beginnings as a potter I have made dinner plates in a mold because it is less time consuming. I can make them on the wheel too because some folks like the symmetry that wheel thrown plates provide, but because the expectation with a stack of dinner plates is that they are all the exact same size with the exact same size foot ring too, wheel thrown dinner plates are actually more expensive for me to make because they are far more time consuming considering all the measuring and fine work that goes into matching every plate. Hand built dinner plates are far less time consuming because I use a mold, therefore I can make dinner plates at a lower cost for my customers if they are hand built.
I call my dinner plates and sandwich plates CaveWare because they aren’t meant to look perfectly round. The edges are hand cut and are purposefully uneven to give them a more artsy look. I used to call them “Flintstone” plates but I thought the Hanna/Barbera Corp. would be upset with me if I used that name. The CaveWare plates stack very nicely because they’re the same size seeing as I made them in a mold. My mold of choice? Old acoustic ceiling tile material with a hole cut in it. I get discards from the lumber store. If the ceiling tile in missing a corner or is water damaged then I get them for a reduced price and sometimes FREE! Yay!
Now, the bottoms of the CaveWare plates are not glazed because they do not have a foot ring. What is a foot ring anyway? It’s that ring of unglazed clay on which the pots sits in the kiln. If one were to put glaze on the entire bottom of any pot and fire it, it would be fused to the kiln shelf, so when one makes a piece on the wheel after it dries up for about 3-4 days (depending on the weather and/or season) it is turned upside down and a foot ring is carved out with a trimming tool.
The bottoms on CaveWare plates are flat and have a good deal of exposed, unglazed clay that could potentially be touching your shiny wood table and possibly scratch it. After all it is stoneware and there is grog in the clay. I use a rubber rib to press the grog back into the bottom of the plate, and I sand the plates after they are fired so the yfeel soft as a baby’s bottom, but they can still be a little scratchy, like micro-scratchy. For this reason I recommend place mats or a table cloth. I can also make plate from porcelain which has no grog in it at all. Either way, where else can you get a beautiful hand made (hand built) dinner plate for under $30 unless it’s made by a potter?
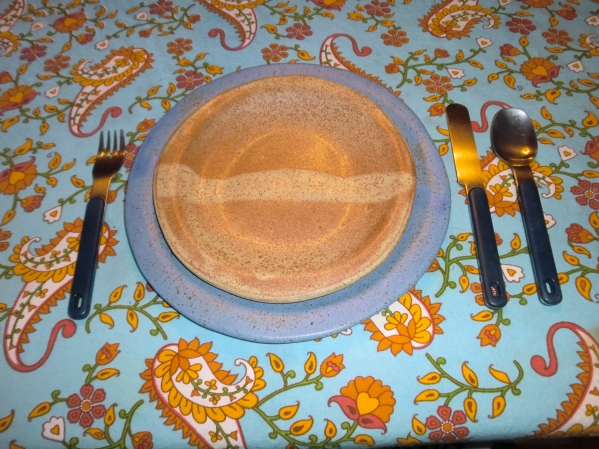
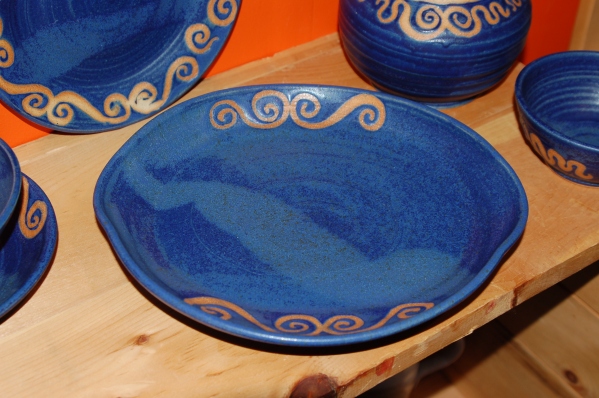
Place setting – 10” blue dinner plate (glaze – blue jeans) with sandwich plate (glaze – oatmeal) on top. From my own cupboard.
All of the dishes I’ve seen at The Super Store or Wal-Mart or Canadian Tire simply do no measure up. Those plates are made by machinery; possibly glazed by a human. I don’t know. They are usually made in and shipped from China at a great cost to the environment. Do you know what’s in the glaze on those plates? Neither do I, but I know what’s in my glaze and I know it isn’t lead.
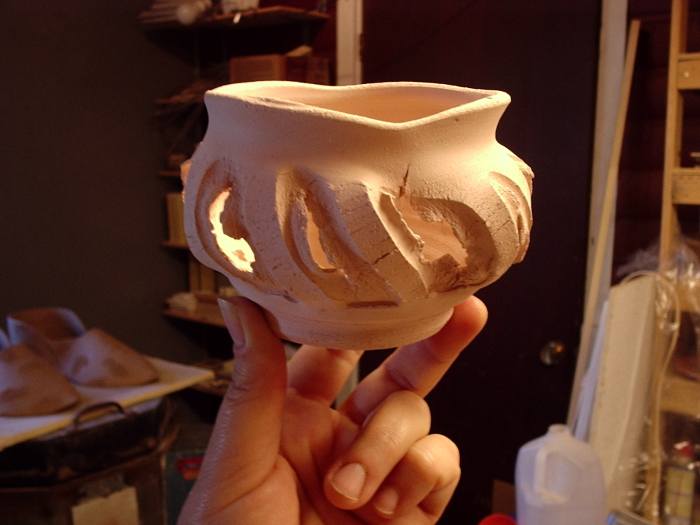
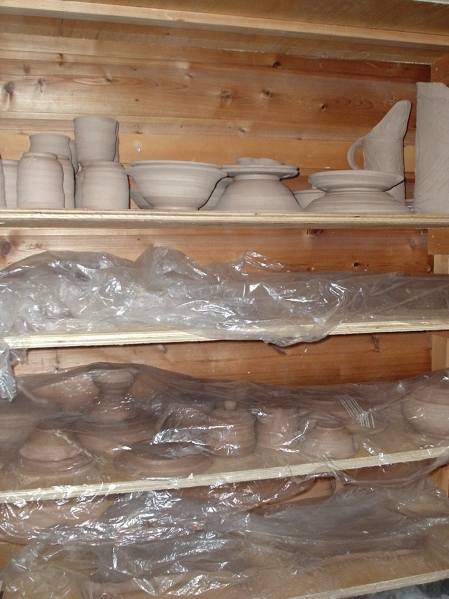
So getting back to the way pots are made: Open box of clay, cut off a piece, wedge it and either hand build with it or throw a pot on the wheel. This is the simplified version of how to make a pot. My techniques will be show in a future video blog. After the pot is made it is covered in a sheet of thin plastic (the type from the dry cleaner’s and thanks to my sister-in-law who collects it for me I have an ongoing supply) and put on the shelf to dry. Depending on the type of clay it is – some types dry more quickly than others – it takes about 3-4 days of drying before I go to the next step. Sometimes it’s just 2 days, sometimes it’s 7 days. You never know. You just have to keep checking the pots every day to catch them at the right time for the next step.
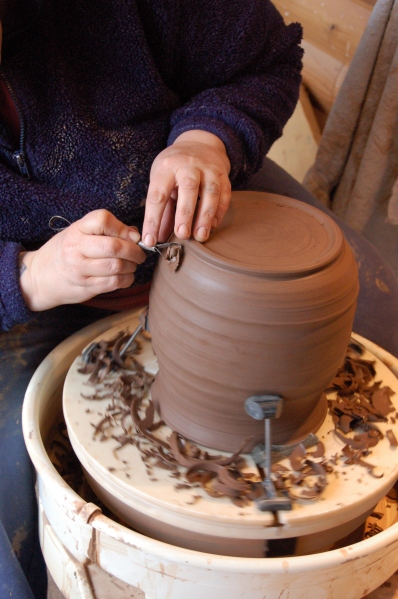
The next step for a wheel thrown pot is trimming. As I mentioned, the pot is turned upside down and trimmed with various types of trimming tools. I use the right tool for the job and I use a Giffin Grip which is a tool used to hold the pot on the wheel head as well as centre it at the same time. The CaveWare plates are turned over and the bottoms are smoothed out, the edges are hand cut and I bevel the edge too. I give great attention to details.
After trimming the pot it is put up on the shelf once again, covered in plastic and left until bone dry. This could take up to 3 weeks especially if it is humid.
After the pots are bone dry I can do a bisque firing. The first firing is called bisque taken from the French word “biscuit” as in cookie because the pots resemble the colour of a cookie when they come out of the first firing. Bisque firing to a low-ish temperature of 1970 degrees F means the pots remain porous and ready to accept glaze right into the pores of the piece, but they are strong enough to handle without worrying that they’ll fall apart when taking on the glaze.
Glaze can be made up of various clays, silica, a melting component or flux, colourants, sometimes opacifiers and water. When a pot that is not bisque fired is dipped into a bucket of glaze, the chances of that peice getting too wet and breaking or cracking is greater than if it is bisque fired.
It takes a lot of pots to fill a kiln for bisque firing. Because the pots have no glaze on them, I can stack pots on top of pots or inside bigger pots. This method is preferred because it saves boat loads of energy plus the more slowly the kiln cools from all those pots being in there, the better the firing.
It takes about an hour or so to load my biggest kiln for a bisque firing. In fact, this is what I should be doing right now because I have several orders that I must get out by Monday, so excuse me while I go to the pottery and load my kiln, Big Bert. Okay! The kiln is loaded and warming up or “candling,” which means it’s heating slowly to 200 F and then I’m letting it stay at that temperature for a few hours to make sure there is no moisture left in the pots. 212 F is boiling temperature so you can imagine what would happen to the pot if any water was inside and started to heat to a boil. BOOM! Hence the reason for candling. After candling I get Big Bert going and fire overnight. A bisque firing takes about 6-8 hours and then about 24 hours to cool off enough to unload the pots.
Once unloaded each pots gets inspected for cracks and warping. If I see either, they get the hammer. Both can happen but once you get really good at your job it happens less often. I sand each pot to make sure there are no unsightly bumps or lumps and then I take the pots over to the kitchen and wash them with water (no soap) thoroughly because dust can actually ruin the glaze job on the pot or the entire bucket of glaze can get contaminated with dust and then it has to be disposed.
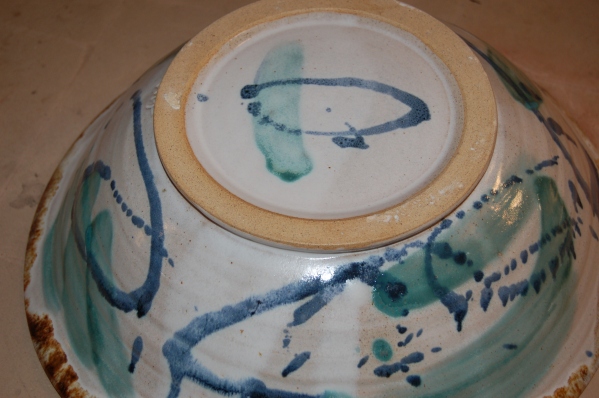
Once the pots are dry from being washed, which takes about 4 – 6 hours or so because they are porous, I stack them up and take them back to the pottery where foot rings and the bottoms of pots get an application of liquid wax resist. The wax resists the glaze on the pots where I don’t want glaze. I use wax resist to decorate some of my pots like this:
After the wax is applied it takes at least two hours to dry and then I’m ready to glaze the pots.
There is a lot of grunt work that goes on in the pottery. It ain’t all fun. Jobs vary from mixing and recycling clay to cleaning glaze spits from kiln shelves, painting kiln shelves with kiln wash so the shelves stay in good shape firing after firing, cleaning the wheel, tools, scrap clay buckets, glaze buckets, and mixing glazes. There’s more but I don’t wanna bore ya. I mix glazes when I run low and it doesn’t usually happen on the same day that I glaze. Mixing glazes is fairly labour intensive. I use tried and true recipes and it involves carefully measuring each raw material into a bucket of pre-measured water and then letting the materials slake or soak into the water. After that I mix it up with a paint mixer on the end of my electric drill and then I sieve the glaze 4-6 times. After each glaze is sieved I must clean the sieve thoroughly and the spare bucket as well so I don’t contaminate the next glaze with materials, especially colourants, that I used in the glaze I mixed before. Because of the fine particles of the raw materials I must wear a respirator and gloves while doing this job. Silica is one material that is often used in glazes and there is silica in clay as well. Silica can shred your lungs and cause silicosis or potter’s rot. I wear my respirator when sanding pots as well.
When I glaze I choose to dip the pots into the bucket of glaze or pour the glaze onto the pots. Sometimes I use multiple glazes and the effects can be very pretty or pretty ugly. Before sacrificing a pot I use a test tile to test new combinations of glazes.
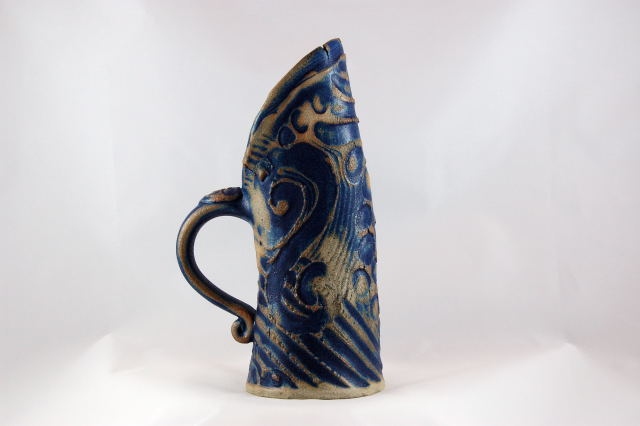
Glazes aren’t like paint. Paint can be easily tinted. Think about your last trip to the paint store. Perhaps you’ve heard about a potter who “paints” glaze onto a pot. They’re probably using underglaze or overglaze to “paint” a design on a pot. Majolica ware is like that and while I admire the technique I’m personally not interested in painting on a pot. I prefer to work with the wet clay body and I like to use wide swaths of colour and minimal decoration. In the photo below I have dipped the entire jug into one glaze and then taken a damp sponge and wiped back the glaze to expose the texture.
So getting back to the paint thing – glazes aren’t easily changed to suit your individual taste. A customer who would like to choose a glaze colour should be aware that it isn’t as easy as choosing a paint colour. You know, you go to the paint store and pick out a colour from a paint chip and the clerk gets some white paint and adds tint. That’s easy peasy compared to changing or creating a glaze, so when I get someone asking me for a lighter shade of blue or telling me that they want a nice pinkish gray – something that is not already in my glaze pallette, well unless you have a couple of years to wait while I test a new glazes in between making pots for shows and for paying customers, it probably isn’t going to happen. I make new glazes when I have time to do so and then extensive testing goes on before I will use it on a pot that will be sold. I have to test it for durability, chemical leeching, how it fires on each of my clay bodies – and I presently use 3 different clay bodies…make that 4. Right now I’m thinking of making a glossy black glaze and I’ve been thinking about that for about 3 years.
I usually give myself a 4 – 7 days to glaze a load of pots, but I often times have to pull several 12-14 hour days in a row if I have a deadline. Once the pots are all glazed and the foot rings are cleaned up (sometimes even with wax resist small beads of glaze can stay on where I don’t want it) and the textured pots are wiped back, I can start to load the kiln. Loading a glaze kiln is a bit more tricky than a bisque. None of the glazed pots can touch because they will fuse together if they do. I have glazes that fire well at the very top and very bottom of the kiln (the “cool” spots) and I have glazes that fire well in the middle (the hot spot) and glazes that fire well just above the bottom and just below the top. So it’s like a jigsaw puzzle sometimes and it has taken me years to get this down.
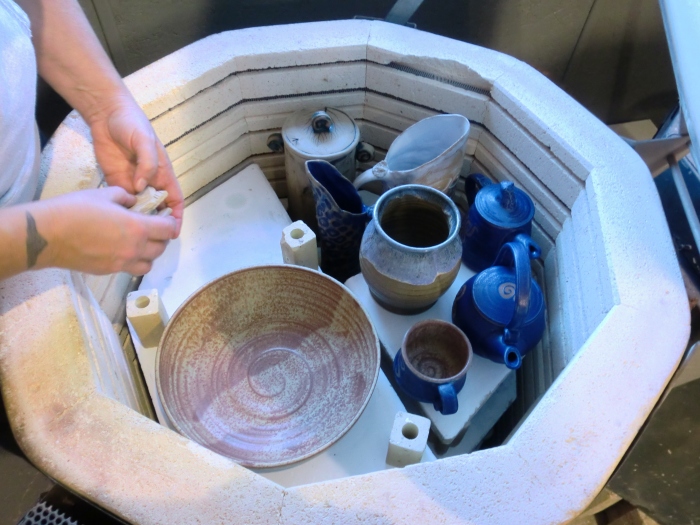
With the kiln loaded I candle it for a couple of hours or until I feel no more moisture coming from the freshly glazed pots inside. I use a very scientific method to determine this: a mirror. If the mirror steams up, it’s still wet inside. When it’s finally dry, I turn up the kiln and let the computer controller do its thing, usually over night. When I wake up the next day it’s well before the end of the firing which takes on average 12 hours. I watch for the pyrometric cones to melt exactly the way I want them. Telling you about pyrometric cones is a blog for another day, but suffice it to say that I keep a careful watch on my cones and when they melt just right, the kiln gets turned off and then I wait for 24 – 36 hours for the kiln to cool down before I can open it to see what treasures are inside.


I see her put in the hours, the dedication, the Love all the time. It’s quite amazing really.
Aaawww! Thanks honey!
keep on writing – we love to read it!
Thanks!! 😀
Gorgeous post, Lisa-Marie, and it expresses my take on art and photography perfectly. Oh and I love Asian and Asian style pottery. Your own pieces are just gorgeous.
Thank you Cate. Hope to see you out here at the pottery soon. 😉
really loved learning more about your process 😀 thanks for the education 😀
That is my aim. Thanks for recognizing it. I once had a pottery student who after her first lesson on the potters’ wheel shouted out, “OKAY! Now I know why a hand made pottery bowl costs $50!!” Ha haa!! That still makes me smile.
Very informative..thanks for sharing!
Thanks for taking the time to read!
Thank you so much for sharing this hon. Too often people lose sight of the incredible amount of work, dedication and skill that goes into hand made objects. Your art is just incredible to me. I love it so much. Reading this, I have a profound respect for you and all potters.
Thank you!
I thought you would be able to relate because you knit. It is really incredible how many hours goes into lovingly creating something with your very own hands!
You utterly amaze me! Beautiful.
Thank you, Ardriana for always being one of my biggest supporters. You amaze me too!